Preparation before cleaning
Before cleaning, all the connectors on the PCB, including jumper plug, card board, battery and IC, must be carefully pulLED out one by one. The potentiometer, transformer and solenoid coil (inductance coil) must also be removed from the PCB Note: Non electronic professionals are not allowed to carry out this operation, because it is easy to damage parts and PCBs when disassembling without electronic expertise. Fortunately, there are basically no such components on computer related PCBs].
Therefore, once the water enters into the components, the water drops between the gaps or wire turns are difficult to be purged by compressed air and the water is difficult to be dried. During the disassembly, records must be made one by one to ensure that no error will occur during the recovery after cleaning. At the same time, check whether the electrolytic capacitor on the PCB has liquid leakage or bulge on the top. If yes, remove it and make a record, so as to replace it with a new product of equivalent value after the PCB is cleaned.
For the PCB of the computer power supply, check whether there are cracks or loose solders between the bonding pad of the printed circuit and the component pins, especially the high-power components. If cracks or loose solders are found, repair them immediately. If one is found, repair one, otherwise it is easy to miss.
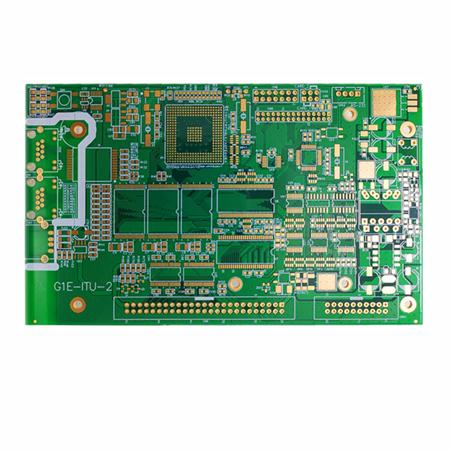
Cleaning method
1. Before cleaning, use a clean soft paint brush (one inch wide brush is better) and dry compressed air with a pressure of about 0.1Mpa [1kg/cm2] to remove the dust on the PCB.
2. The special cleaning liquid (commonly known as board washing water) can be used for cleaning PCBs, and this liquid can be bought at a special store. If there is no board washing water, you can do as follows: (Now we generally do not need board washing water) First use tap water to wash, pay attention to the water flow to be soft, not too strong, and use a soft brush to carefully brush while flushing, so are both sides of the PCB.
3. Then use a soft brush DIPped in neutral soap to carefully and gently clean every part of the PCB, especially the jumper plug, the inside and bottom of the slot (CPU slot, AGP slot, PCI slot, memory slot), the bottom of the IC socket, the north south bridge chip, BIOS chip and every other IC chip, and the bottom of the large capacitor. During operation, be careful not to touch the SMAll capacitors and other components that are installed vertically; If it is found that the soap foam is very dirty, it must be washed with clean water and then brushed again with soap until the soap foam is white.
4. Then rinse the PCB thoroughly with clean water. Note: Soap water must be thoroughly washed away.
5. After washing, use dry compressed air with a pressure of about 0.1Mpa [1kg/cm2] to blow off water drops, especially the jumper plug, the inside and bottom of the slot (CPU slot, AGP slot, PCI slot, memory slot), the bottom of the IC socket, the North South Bridge chip, BIOS chip and each other IC chip, and the bottom of the large capacitor, etc., should be purged from different directions, Try to blow all the water drops in the gap clean. If you don't have compressed air, you can use a rubber hand pump that specializes in clock maintenance or CAMera maintenance, but it's tiring.
6. Wash the PCB again slightly with secondary distilled water or anhydrous alcohol (keep the side with components welded upward, place the PCB obliquely, and clean it from top to bottom with clean oil painting pen No. 10~12 dipped in anhydrous alcohol). Carbon tetrachloride is more effective, but it is toxic. You must be careful when using it. Do not use it unless it is necessary. Carbon tetrachloride is generally not recommended.
So far, the cleaning is over. This cleaning is not only clean and thorough, but also economical, environmentally friendly and healthy.
然后
联系
电话热线
13410863085Q Q

微信

- 邮箱

